Understanding NVMe SSDs
NVMe (Non-Volatile Memory Express) is a high-speed interface designed specifically for solid-state drives (SSDs). Unlike traditional SATA SSDs, NVMe technology leverages the PCIe bus to achieve significantly faster read and write speeds, making it an ideal choice for modern computing environments. This advancement in storage technology not only improves system performance but also enhances responsiveness, allowing users to multitask more efficiently.
One of the key advantages of NVMe SSDs lies in their architecture. Traditional SATA SSDs are limited by the SATA interface’s maximum throughput, which is around 600 MB/s for a single lane. In contrast, NVMe drives can achieve speeds up to 3,500 MB/s or more when using multiple lanes on the PCIe bus. This dramatic increase in transfer rates translates into faster application launches, quicker file transfers, and smoother gaming experiences. The reduced latency offered by NVMe technology further accelerates data access, making it particularly beneficial for applications that require rapid I/O operations.
Another important aspect of NVMe SSDs is their compatibility with modern laptops. Not all laptops are equipped to handle NVMe drives due to varying motherboard designs and available PCIe slots. However, the increasing prevalence of NVMe support in recent laptop models underscores its growing importance in consumer electronics. For those considering an upgrade, it’s crucial to ensure that your laptop’s motherboard supports M.2 NVMe SSDs before proceeding with any purchase or installation. This compatibility check can often be found in the laptop manufacturer’s specifications or through third-party hardware databases.
Identifying Your Laptop’s Storage Capabilities
Before embarking on an NVMe SSD upgrade, it is essential to assess your laptop’s current storage setup and identify potential limitations or opportunities for improvement. Understanding your laptop’s motherboard architecture and available PCIe slots will guide you in selecting the most suitable NVMe drive.
Firstly, it is important to determine whether your laptop supports NVMe at all. This can be achieved by checking the specifications provided by the manufacturer or using a tool like CPU-Z on Windows-based laptops. Ensure that your system has an M.2 slot compatible with NVMe SSDs, as older models might only support SATA-based drives. Additionally, verify if your processor and chipset are capable of handling data transfer speeds associated with PCIe lanes, which can significantly impact performance.
Moreover, it is crucial to evaluate the existing storage capacity and compatibility within your laptop’s hardware configuration. Some laptops have proprietary drive configurations or specific form factors for their M.2 slots that may not accommodate standard NVMe SSDs. Therefore, consulting a reliable source such as the manufacturer’s support website or an online community can help determine if your chosen NVMe SSD will fit seamlessly into your device. Understanding these nuances ensures a successful and hassle-free upgrade process.

Preparing Your Laptop for the Upgrade
Once you have confirmed that your laptop supports NVMe, it is time to prepare for the actual installation of the new drive. This preparation phase involves several critical steps to ensure a smooth transition from an older storage solution to a high-performance NVMe SSD. Proper planning and attention to detail can prevent potential issues during the upgrade process.
To begin with, back up all your data thoroughly before starting any hardware modifications. While modern laptops are designed to handle upgrades safely, it is always advisable to safeguard valuable files against accidental loss or corruption. Use external storage devices such as USB flash drives or portable hard disks to create comprehensive backups of essential documents, photos, and system settings.
Next, remove the existing SSD from your laptop if you plan on installing a new NVMe drive alongside it. This step ensures that both drives do not conflict with each other during boot-up or data access processes. Additionally, familiarize yourself with the location of the M.2 slot within your laptop’s chassis and ensure you have the necessary tools for safe removal and installation. Typically, this involves using a small Phillips-head screwdriver to unfasten any securing screws holding the current drive in place.
Lastly, before inserting the new NVMe SSD into its designated slot, carefully inspect both the drive itself and the motherboard slot for any debris or dust particles that might interfere with proper seating. Cleanliness is paramount when dealing with sensitive electronic components; even minute contaminants can cause connection issues leading to degraded performance or hardware failures. Ensuring a clean installation environment not only promotes optimal functionality but also extends the lifespan of your new NVMe SSD.
Installing the NVMe SSD
Installing an NVMe SSD into your laptop is both rewarding and straightforward, provided you follow the correct procedure meticulously. This process requires careful handling and attention to detail to ensure that all connections are secure and properly seated, thereby maximizing performance benefits.
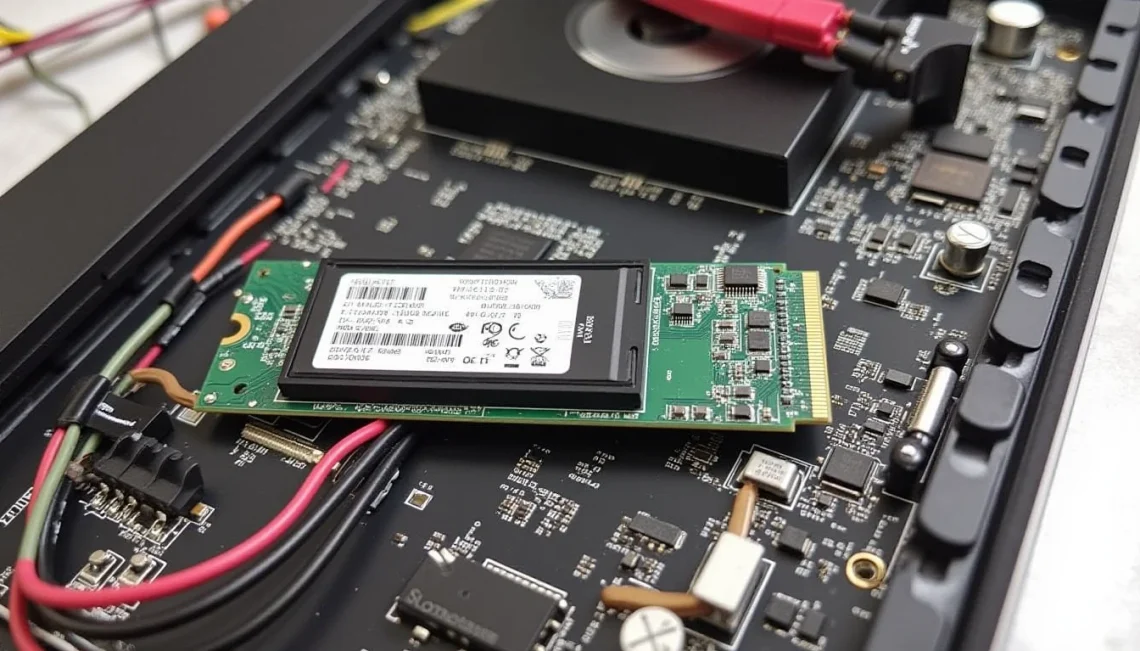
The first step involves positioning the NVMe drive correctly within its designated M.2 slot on the motherboard. Typically, this will require aligning one end of the SSD with the cutout in the bracket above the slot before gently pressing it into place until you hear a satisfying click indicating secure attachment. It is crucial to ensure that both ends of the drive are firmly seated without any wobbling or misalignment, which can lead to poor contact and reduced data transfer rates.
Following proper seating of the NVMe SSD, secure it further by tightening the retaining screw(s) provided specifically for this purpose. This additional step ensures mechanical stability while preventing accidental removal during regular usage. Failure to tighten these screws adequately could result in intermittent connectivity issues or even physical damage if subjected to rough handling. Always refer to your laptop’s manual or manufacturer guidelines regarding torque specifications and appropriate tools for this task.
Once the NVMe SSD is securely installed, proceed to connect it electrically by ensuring that all necessary wires are properly attached and that there are no loose ends protruding from underneath the motherboard. Some laptops may require additional power connectors (such as SATA power) for optimal performance; always check your specific model’s requirements before finalizing connections. Afterward, replace any removed panels or covers to maintain internal airflow integrity and aesthetic appearance.
Configuring Your New NVMe SSD
After successfully installing the NVMe SSD in your laptop, configuring it properly is essential to unlock its full potential. This involves several steps including partitioning the drive, setting up operating system drivers, and optimizing settings for maximum performance.
Firstly, initialize and partition the new NVMe SSD using a reliable tool like Disk Management on Windows or GParted on Linux systems. Proper partitioning ensures optimal allocation of space across different drives without causing conflicts with existing storage configurations. Additionally, formatting the drive to NTFS (Windows) or ext4 (Linux), depending on your OS preference, facilitates efficient file management and supports advanced features offered by modern operating systems.
Next, reinstall any necessary drivers for your new NVMe SSD after booting from it. Manufacturers often provide driver packages specific to their hardware models that can be downloaded directly from their official websites. Installing these ensures full compatibility with various software applications while enhancing overall system stability. Furthermore, updating BIOS firmware on compatible laptops may also yield performance improvements by optimizing interactions between the CPU and storage devices.
Finally, optimize your operating environment for maximum efficiency through adjustments made within OS settings menus or third-party utilities designed specifically for SSDs. These optimizations include disabling hibernation mode (which consumes additional disk space), enabling TRIM commands to maintain optimal write speeds over time, and configuring power management profiles to suit specific usage scenarios. Such fine-tuning efforts contribute significantly towards achieving peak performance levels while extending the lifespan of your newly installed NVMe SSD.

